Recently, I wrote a guide on how to deploy a dash application using Google Cloud Platform (GCP) ⧉. Based on other guides from the internet, this deployed the app using GCP’s Compute Engine ⧉. For a lightweight public application, this may not be the best option. If you want to restrict access to your app, this cannot be done at the time of writing using Cloud Run though.
Here, I will show you how to use Docker ⧉ and GCP’s Cloud Run ⧉ service to create a cheaper hosted dash application.
Step 1: Dockerising your Dash Application
Dockerfile
Please see step 1 of the previous guide ⧉ if you want to see how to create a simple Dash application.
Paramount to creating a Docker container is the Dockerfile. Here, we put this in the root directory, and add the following to the Dockerfile:
FROM python:3.6

WORKDIR /app

COPY . /app

RUN pip install --trusted-host pypi.python.org -r app/requirements.txt

EXPOSE 8080

CMD ["python", "app/main.py"]
This will install all the packages needed from the requirements.txt file and run main.py from the app folder.
Build the Docker File
First, cd to the root directory in your command line.
To create the Docker image you will need to provide a tag related to your GCP project using the following.
docker build . -t [eu.]gcr.io/<PROJECT-ID>/<IMAGE-ID>
Where you should keep eu. to build using the EU GCP servers. IMAGE-ID can be anything appropriate. You can even append :<TAG-NAME> to add a tag label.
Test the Docker Build
To check your application runs successfully using Docker, then type the following:
docker run -p PORT:PORT [eu.]gcr.io/<PROJECT-ID>/<IMAGE-ID>
Where PORT is the port number specified in main.py. Here, we set it to 8000.
Push the Docker File to GCP
Next, you want to push your Docker image to GCP using.
docker push [eu.]gcr.io/<PROJECT-ID>/<IMAGE-ID>
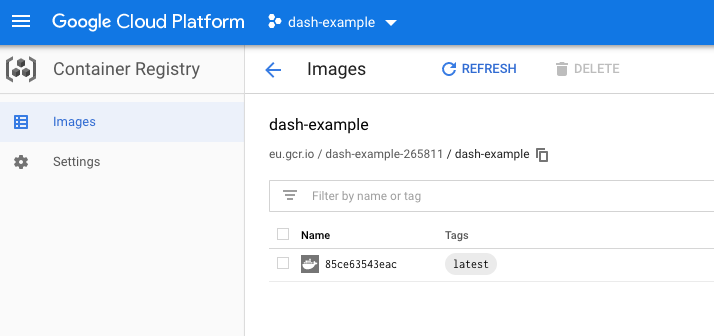
This will create the image at Container Registry > Images on the GCP Console.
Step 2: Create Cloud Run Service
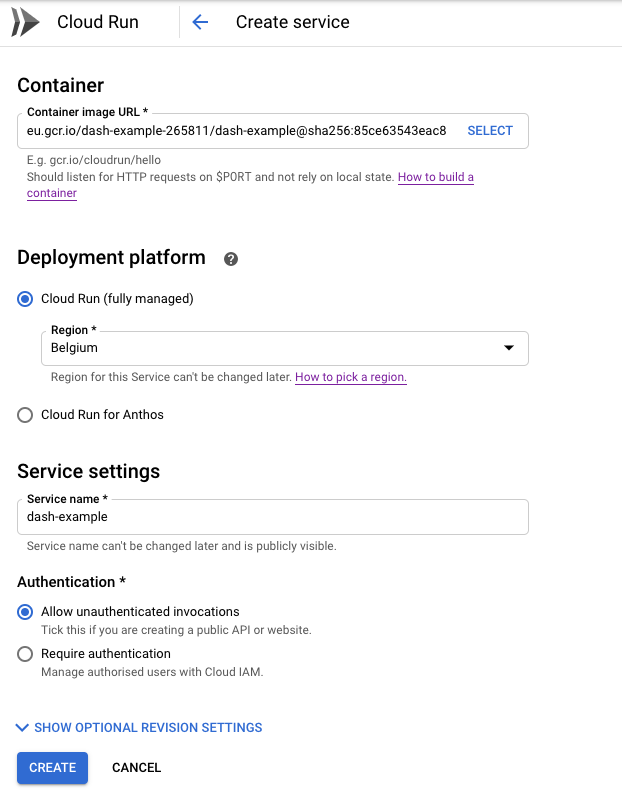
For this I am going to use the GCP Console.
First, on your projects dashboard click Cloud Run on the left-hand side. Then click ‘Create Service’, select the Container Image URL, choose the region (at the time of writing the only EU option is Belgium), Authentication (here set to Allow unauthenticated users), and optional settings. Note, it is important you select the appropriate port specified in main.py (here 8000). Next click ‘Create’ and your app will be created.
Cloud Run or Compute Engine
The benefit of Cloud Run is that it has a time-out feature, whereby it stops the service when no-one is accessing your application. This should save money for small-scale applications. In addition, the first two million calls are free ⧉.
The downside of using Cloud Run is that it performs docker run to activate the app, meaning load up times are slowly. You can increase the memory to 2 GB and add an additional CPU (to 2) to make this start-up faster.
Also, at current it is not possible to restrict access to your application in Cloud Run. Something you may should seriously consider if you’re planning to deploy sensitive information in your application.
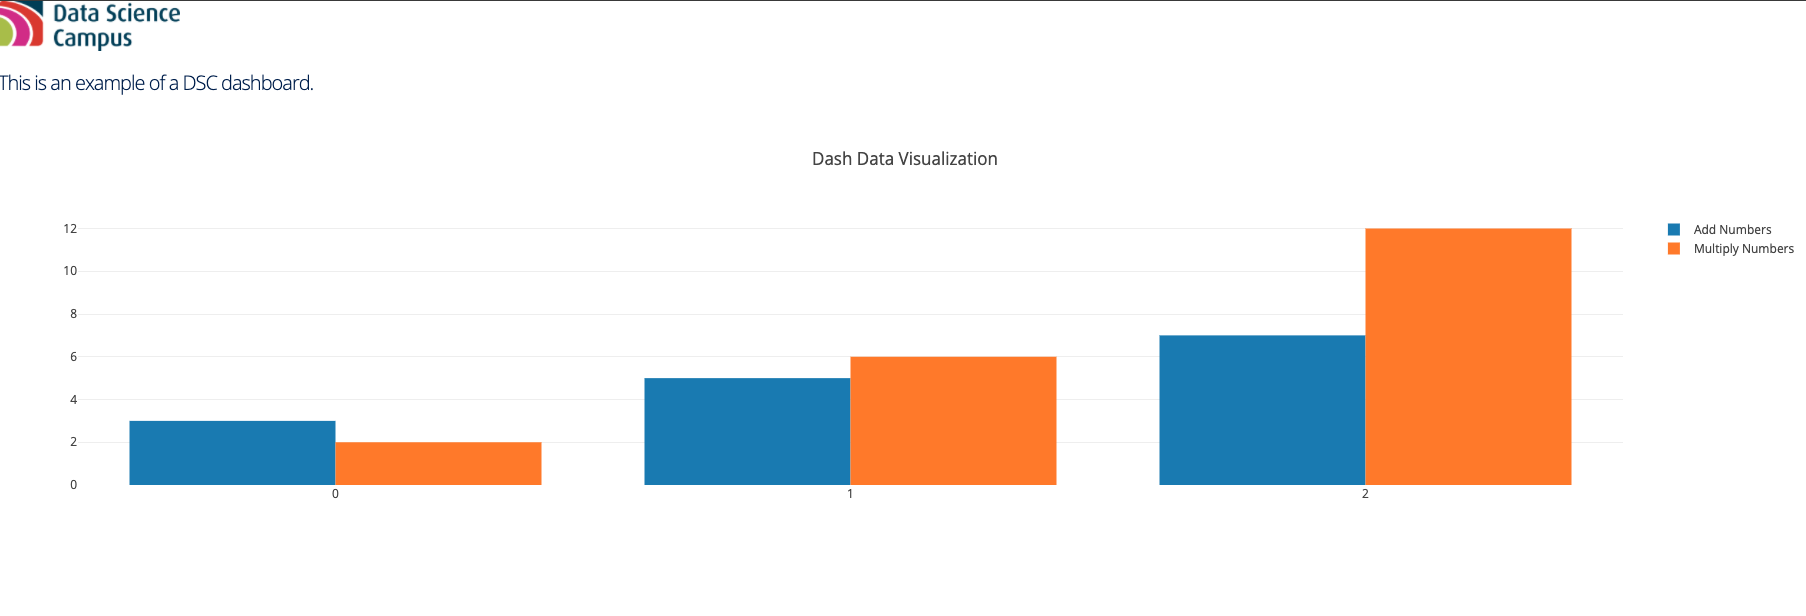
This example is at https://dash-example-iaxj7ygkla-ew.a.run.app/ ⧉.